aiWithDoc前端部分是采用目前非常流程的VUE+ElementUI实现,其中图形展示采用eCharts相关技术实现。aiWithDoc使用最新的前端技术栈,提供各类经过各种项目验证的实用的组件方便在业务开发时的调用。aiWithDoc的核心业务功能是与文档聊天,感兴趣或者有相关技术能力的公司或个人可以基于此项目开发出适合自己的衍生项目。
本文档的作用只是起到抛砖引玉的作用,供广大爱好者或者相关行业工作者学习或借鉴。
aiwithdoc-front
├── package.json				#node.js项目的配置文件,管理各种第三方包
├── public							#存放静态文件的目录
|  ├── element-theme		#相关的elementUI主题
|  ├── favicon.ico			#网站标识的图标文件
|  └── index.html				#项目入口页面
├── README.md						#项目介绍
├── src									#存放项目源码的目录
|  ├── App.vue					#vue的根组件
|  ├── assets						#静态资源(会被打包)
|  ├── components				#组件库
|  ├── echartsTheme			#echarts主题
|  ├── element-ui				#当前element-ui主题样式
|  ├── i18n							#多语言配置
|  ├── icons						#图标目录
|  ├── main.js					#应用程序的入口文件
|  ├── mixins						#存放混入的文件,方便类似功能复用
|  ├── router						#存放路由相关的文件
|  ├── store						#VUEX管理应用程序的状态
|  ├── utils						#公共的自定义的通用函数库
|  └── views						#业务相关功能的视图
├── vue.config.js				#vue-cli配置
├── main.vue			#登录后主页面视图
├── modules				#业务模块
|  ├── filemgt		#文档管理
|  |  ├── chat-dialog.vue			#文档对话
|  |  ├── filemgt-add-or-update.vue
|  |  └── filemgt.vue	#文档管理主页面
|  ├── home.vue	#登录后工作区域内容视图
|  ├── oadocument	#文档管理(类似于云盘)
|  |  ├── document.vue #文档管理
|  |  └── documenttype.vue	#文档类型管理
|  └── sys	#系统管理
|     ├── choose-dept-tree.vue	#部门树
|     ├── dept-add-or-update.vue	#部门增加或修改
|     ├── dept-set-leader-list.vue	#设置部门负责人
|     ├── dept.vue	#部门管理
|     ├── dict-data.vue	#字典管理
|     ├── dict-type.vue	#字典类型管理
|     ├── log-error.vue	#错误日志
|     ├── log-login.vue	#登录日志
|     ├── log-operation.vue	#操作日志
|     ├── menu.vue	#菜单管理
|     ├── params.vue	#全局参数管理
|     ├── region.vue	#区域管理
|     ├── role.vue		#角色管理
|     └── sysuser.vue	#用户管理
└── pages
   ├── 404.vue	#404页面视图
   └── login.vue	#登录页面视图
一个成熟的项目包含很多技术框架类的内容,例如组件库,自定义函数库,路由处理,多语言,UI样式等等。由于此aiWithDoc是一个完整的项目,虽然业务功能点不多,但技术框架该有的基础功能已经基本涵盖(工作流相关没有包括进来),以下从二个功能点代码进行讲解,起到抛砖引玉的作用,完整的代码学习还需要自行在项目中或者自行debug进行学习。
一般大部分的应用系统都有登录功能,为了安全性或者不同角色使用不同的功能使用。互联网上的应用很多使用了第三方的一键登录,例如微信扫码登录、关注公众号登录、支付宝账号登录、短信息验证登录等等。但企业内部的应用系统,基本还是采用用户名及密码登录,为了防止暴力破解,一般会加一个验证码进行验证。前端代码如下:
<template>
  <div class="aui-wrapper aui-page__login">
    <div class="aui-content__wrapper">
      <main class="aui-content">
        <div class="login-header">
          <h2 class="login-brand">{{ $t('brand.lg') }}</h2>
        </div>
        <div class="login-body">
          <h3 class="login-title">{{ $t('login.title') }}</h3>
          <el-form :model="dataForm" :rules="dataRule" ref="dataForm" @keyup.enter.native="dataFormSubmitHandle()" status-icon>
            <el-form-item prop="username">
              <el-input v-model="dataForm.username" :placeholder="$t('login.username')">
                <span slot="prefix" class="el-input__icon">
                  <svg class="icon-svg" aria-hidden="true"><use xlink:href="#icon-user"></use></svg>
                </span>
              </el-input>
            </el-form-item>
            <el-form-item prop="password">
              <el-input v-model="dataForm.password" type="password" :placeholder="$t('login.password')">
                <span slot="prefix" class="el-input__icon">
                  <svg class="icon-svg" aria-hidden="true"><use xlink:href="#icon-lock"></use></svg>
                </span>
              </el-input>
            </el-form-item>
            <el-form-item prop="captcha">
              <el-row :gutter="20">
                <el-col :span="14">
                  <el-input v-model="dataForm.captcha" :placeholder="$t('login.captcha')">
                    <span slot="prefix" class="el-input__icon">
                      <svg class="icon-svg" aria-hidden="true"><use xlink:href="#icon-safetycertificate"></use></svg>
                    </span>
                  </el-input>
                </el-col>
                <el-col :span="10" class="login-captcha">
                  <img :src="captchaPath" @click="getCaptcha()">
                </el-col>
              </el-row>
            </el-form-item>
            <el-form-item>
              <el-button type="primary" @click="dataFormSubmitHandle()" class="w-percent-100">{{ $t('login.title') }}</el-button>
            </el-form-item>
          </el-form>
        </div>
        <div class="login-footer">
          <p>{{ $t('login.copyright') }} 2014 - 2025 © </p>
        </div>
      </main>
    </div>
  </div>
</template>

<script>
import Cookies from 'js-cookie'
import debounce from 'lodash/debounce'
import { messages } from '@/i18n'
import { getUUID } from '@/utils'
export default {
  data () {
    return {
      i18nMessages: messages,
      captchaPath: '',
      dataForm: {
        username: '',
        password: '',
        uuid: '',
        captcha: ''
      }
    }
  },
  computed: {
    dataRule () {
      return {
        username: [
          { required: true, message: this.$t('validate.required'), trigger: 'blur' }
        ],
        password: [
          { required: true, message: this.$t('validate.required'), trigger: 'blur' }
        ],
        captcha: [
          { required: true, message: this.$t('validate.required'), trigger: 'blur' }
        ]
      }
    }
  },
  created () {
    this.getCaptcha()
  },
  methods: {
    // 获取验证码
    getCaptcha () {
      this.dataForm.uuid = getUUID()
      this.captchaPath = `${window.SITE_CONFIG['apiURL']}/captcha?uuid=${this.dataForm.uuid}`
    },
    // 表单提交
    dataFormSubmitHandle: debounce(function () {
      this.$refs['dataForm'].validate((valid) => {
        if (!valid) {
          return false
        }
        this.$http.post('/login', this.dataForm).then(({ data: res }) => {
          if (res.code !== 0) {
            this.getCaptcha()
            return this.$message.error(res.msg)
          }
          Cookies.set('token', res.data.token)
          this.$router.replace({ name: 'home' })
        }).catch(() => {})
      })
    }, 1000, { 'leading': true, 'trailing': false })
  }
}
</script>
页面效果如下:
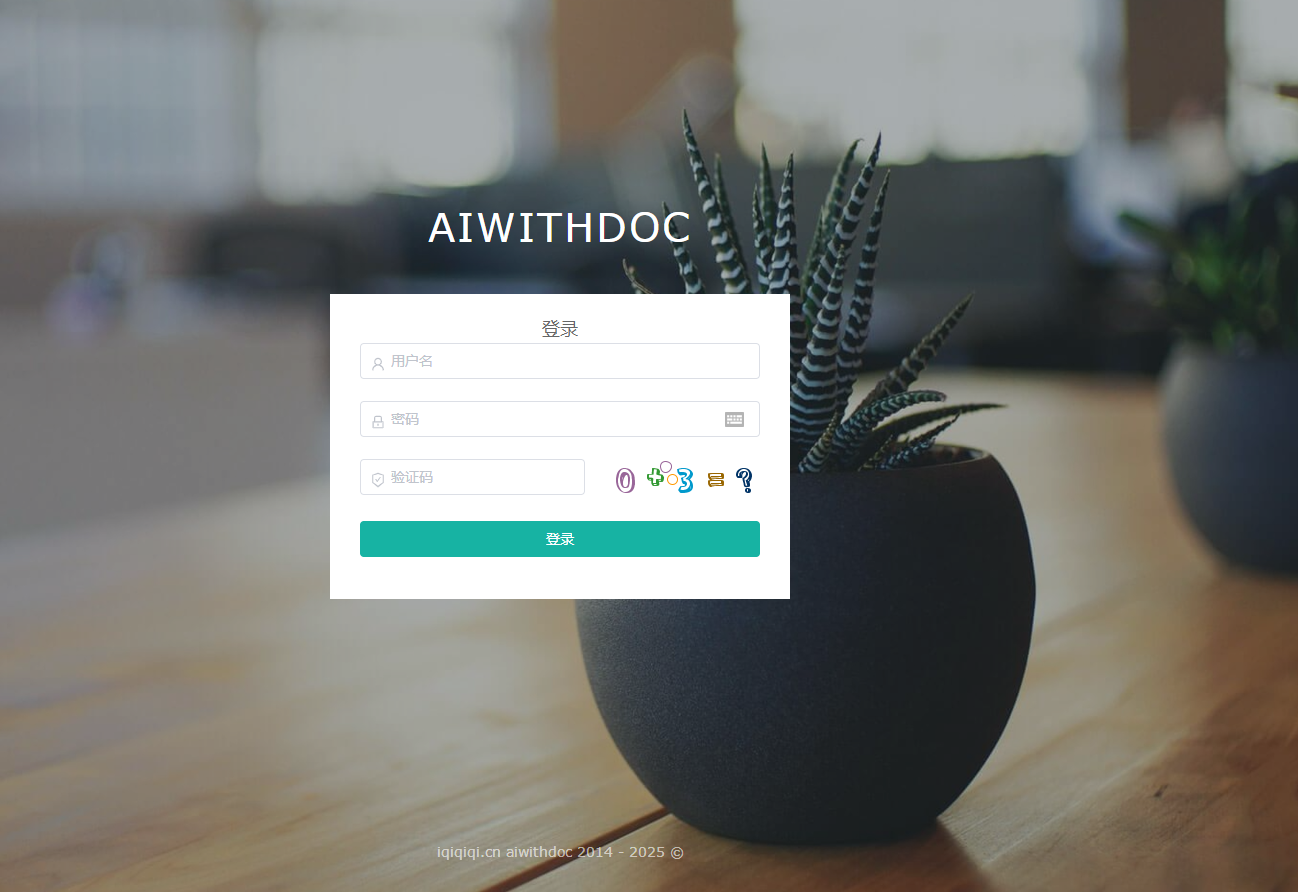
以上代码包含了登录页面的布局和逻辑。在模板部分,使用了Element UI库的组件来构建登录表单。其中包括了用户名、密码和动态验证码的输入框,以及一个提交按钮。通过v-model指令将输入框的值与data中的dataForm对象进行双向绑定,使得输入框的值可以实时更新到dataForm对象中。
在脚本部分,首先引入了一些依赖,包括js-cookie库和lodash库的debounce函数。然后定义了组件的data属性,包括了多语言消息、验证码图片和表单数据。其中,dataForm对象包含了用户名、密码、uuid和验证码。
computed属性定义了表单的验证规则,主要是用户名、密码的必填规则。
在created生命周期中,调用了getCaptcha方法来获取验证码图片。
dataFormSubmitHandle方法是表单提交的处理函数,使用了debounce函数来防止抖动。this.http.post方法向服务器发送登录请求,根据服务器返回的结果进行处理,如果登录成功则将token保存到Cookies中,并跳转到首页,否则重新获取验证码并显示错误信息。
要实现与文档,首先需要将文档上传到服务器上,其次点击训练功能进行文档切片和向量化存储,然后才能点击对话进行与文档沟通。以下是文档管理的前端代码
<template>
  <el-card shadow="never">
    <div class="mod-filemgt__filemgt}">
      <el-form :model="dataForm" @keyup.enter.native="getDataList()">
        <el-row :gutter="1" type="flex">
          <el-col :span="4">
            <el-form-item>
              <el-input v-model="dataForm.name" placeholder="名称" clearable></el-input>
            </el-form-item>
          </el-col>
          <el-col :span="3">
            <el-form-item>
              <my-select v-model="dataForm.isTraining" dict-type="isTraining" placeholder="是否训练" clearable></my-select>
            </el-form-item>
          </el-col>
          <el-col :span="4">
            <el-form-item>
              <el-input v-model="dataForm.suffix" placeholder="后缀" clearable></el-input>
            </el-form-item>
          </el-col>
          <el-col :span="3">
            <el-form-item>
              <el-input v-model="dataForm.remarks" placeholder="描述" clearable></el-input>
            </el-form-item>
          </el-col>
           <el-col :span="10">
            <el-button @click="getDataList()" icon="el-icon-search">{{ $t('query') }}</el-button>
            <el-button v-if="$hasPermission('filemgt:filemgt:save')" type="primary" @click="addOrUpdateHandle()" icon="el-icon-plus">{{ $t('add') }}</el-button>
            <el-button v-if="$hasPermission('filemgt:filemgt:delete')" type="danger" @click="deleteHandle()" icon="el-icon-delete">{{ $t('deleteBatch') }}</el-button>
          </el-col>
        </el-row>
      </el-form>
      <el-table stripe @sort-change="dataListSortChangeHandle" v-loading="dataListLoading" :data="dataList" border @selection-change="dataListSelectionChangeHandle" style="width: 100%;">
        <el-table-column type="selection" header-align="center" width="50"></el-table-column>
        <el-table-column prop="name" label="名称"  header-align="center" min-width="160" show-overflow-tooltip></el-table-column>
        <el-table-column prop="isTraining" label="是否训练"  header-align="center" min-width="160" show-overflow-tooltip>
          <template slot-scope="scope">
            <el-tag effect="dark" type="success" v-if="scope.row.isTraining==='1'">
              {{ $getDictLabel("isTraining", scope.row.isTraining) }}
            </el-tag>
            <el-tag effect="dark" type="info" v-if="scope.row.isTraining==='0'">
              {{ $getDictLabel("isTraining", scope.row.isTraining) }}
            </el-tag>
          </template>
        </el-table-column>
        <el-table-column prop="suffix" label="后缀"  header-align="center" min-width="160" show-overflow-tooltip></el-table-column>
        <el-table-column prop="remarks" label="描述"  header-align="center" min-width="160" show-overflow-tooltip></el-table-column>
        <el-table-column :label="$t('handle')" fixed="right" header-align="center" width="180">
          <template slot-scope="scope">
           <el-button v-if="$hasPermission('filemgt:filemgt:info') && scope.row.isTraining==='1'" type="text" size="small" @click="chatWithFile(scope.row.id)" icon="el-icon-view">对话</el-button>
            <el-button v-if="$hasPermission('filemgt:filemgt:update') && scope.row.isTraining==='0'" type="text" size="small" @click="trainingFile(scope.row.id)" icon="el-icon-edit">训练</el-button>
            <el-button v-if="$hasPermission('filemgt:filemgt:delete')" type="text" size="small" @click="deleteHandle(scope.row.id)" icon="el-icon-delete">{{ $t('delete') }}</el-button>
          </template>
        </el-table-column>
      </el-table>
      <el-pagination
        :current-page="page"
        :page-sizes="[10, 20, 50, 100]"
        :page-size="limit"
        :total="total"
        layout="total, sizes, prev, pager, next, jumper"
        @size-change="pageSizeChangeHandle"
        @current-change="pageCurrentChangeHandle">
      </el-pagination>
      <add-or-update v-if="addOrUpdateVisible" ref="addOrUpdate" @refreshDataList="getDataList"></add-or-update>
      <!--与文档对话dialog-->
      <chat-dialog v-if="chatDialogVisible" ref="chatDialog"></chat-dialog>
    </div>
  </el-card>
</template>

<script>
import mixinViewModule from '@/mixins/view-module'
import AddOrUpdate from './filemgt-add-or-update'
import ChatDialog from './chat-dialog'
export default {
  mixins: [mixinViewModule],
  data () {
    return {
      mixinViewModuleOptions: {
        getDataListURL: '/filemgt/filemgt/page',
        getDataListIsPage: true,
        exportURL: '/filemgt/filemgt/export',
        deleteURL: '/filemgt/filemgt',
        deleteIsBatch: true
      },
      loading: {},
      uploadMsgDialogVisible: false,
      chatDialogVisible: false,
      noMatchDatas: [],
      dataForm: {
        name: '',
        isTraining: '',
        suffix: '',
        remarks: ''
      }
    }
  },
  components: {
    AddOrUpdate, ChatDialog
  },
  methods: {
    trainingFile(id) {
      this.$http.get(`/filemgt/filemgt/training/${id}`).then(({ data: res }) => {
        if (res.code !== 0) {
          return this.$message.error(res.msg)
        }

        this.$message.success('训练完成!');
        this.getDataList(); //刷新列表

      }).catch(() => {})
    },
    chatWithFile(id) {
      this.chatDialogVisible = true
      this.$nextTick(() => {
        this.$refs.chatDialog.dataForm.id = id
        this.$refs.chatDialog.init()
      })
    }
  }
}
</script>
<style scoped>
.el-flex-row {
  flex-wrap: wrap
}
</style>
页面效果如下:
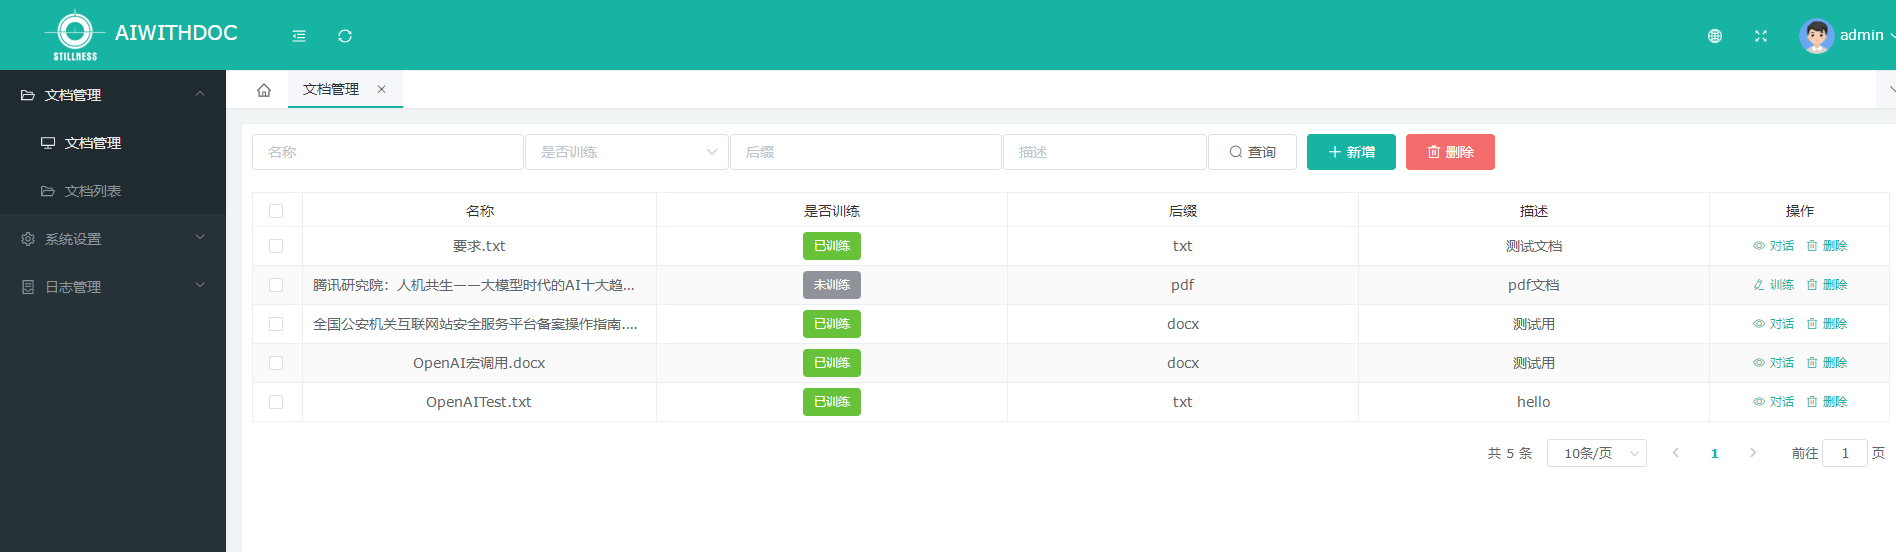
从以上代码可以看出,使用了Element UI库的常用组件,包括el-card、el-form、el-input、el-row、el-col、el-button、el-table、el-table-column和el-pagination等。其中,el-card是一个卡片组件,el-form是一个表单组件,el-input是一个输入框组件,el-row和el-col是用来布局的组件,el-button是一个按钮组件,el-table是一个表格组件,el-table-column是表格的列组件,el-pagination是一个分页组件。
<el-form>是一个表单组件,用于展示文件搜索的表单。@keyup.enter.native="getDataList()"表示在按下回车键时触发相关搜索的方法。
<el-row>和<el-col>是用于布局的组件,:span属性表示占据的列数,:gutter属性表示列之间的间隔。
<el-table>用于展示文件列表。:data属性绑定了dataList属性,表示表格的数据来源。
<el-table>中,使用了<el-table-column>组件定义了表格的列。prop属性表示列对应的数据字段,label属性表示列的标题。
methods定义了两个方法trainingFile和chatWithFile。trainingFile方法用于触发文件的训练操作,发送HTTP请求并根据返回结果进行相应的提示和操作。chatWithFile方法用于打开与文件对话的对话框,并初始化对话框的数据。
点击新增按钮时,弹出新增文件的dialog,代码如下:
<template>
  <el-dialog :visible.sync="visible" :title="!dataForm.id ? $t('add') : $t('update')" :close-on-click-modal="false" :close-on-press-escape="false">
    <el-form :model="dataForm" :rules="dataRule" ref="dataForm" @keyup.enter.native="dataFormSubmitHandle()" :label-width="$i18n.locale === 'en-US' ? '120px' : '80px'">
      <el-form-item label="选择文件" prop="type">
        <el-upload
          class="upload-demo"
          drag
          accept=".txt,.pdf,.docx,.doc"
          :action="doUpload" :show-file-list=true :on-success="uploadSuccess" :on-error="uploadError" :before-upload="onBeforeUpload">
          <i class="el-icon-upload"></i>
          <div class="el-upload__text">将文件拖到此处,或<em>点击上传</em></div>
          <div class="el-upload__tip" slot="tip">只能上传docx/pdf/txt文件,且不超过10Mb</div>
        </el-upload>
      </el-form-item>
      <el-form-item label="描述" prop="remarks">
        <el-input v-model="dataForm.remarks" placeholder="描述" maxlength="200"></el-input>
      </el-form-item>
    </el-form>
    <template slot="footer">
      <el-button @click="visible = false" icon="el-icon-close">{{ $t('cancel') }}</el-button>
      <el-button type="primary" @click="dataFormSubmitHandle()" icon="el-icon-check">{{ $t('confirm') }}</el-button>
    </template>
  </el-dialog>
</template>

<script>
import debounce from 'lodash/debounce'
import Cookies from 'js-cookie'
export default {
  data () {
    return {
      visible: false,
      dataForm: {
        id: '',
        type: '4',  //表示普通文件
        name: '',
        isTraining: '0',
        suffix: '',
        remarks: '',
        ossId: '',
        creator: '',
        createDate: '',
        updater: '',
        updateDate: ''
      },
      doUpload: `${window.SITE_CONFIG["apiURL"]}/sys/oss/upload?token=${Cookies.get("token")}`
    }
  },
  computed: {
    dataRule () {
      return {
      }
    }
  },
  methods: {
    init () {
      this.visible = true
      this.$nextTick(() => {
        this.$refs['dataForm'].resetFields()
        if (this.dataForm.id) {
          this.getInfo()
        }
      })
    },
    // 获取信息
    getInfo () {
      this.$http.get(`/filemgt/filemgt/${this.dataForm.id}`).then(({ data: res }) => {
        if (res.code !== 0) {
          return this.$message.error(res.msg)
        }
        this.dataForm = {
          ...this.dataForm,
          ...res.data
        }

      }).catch(() => {})
    },
    onBeforeUpload(file) {
      const fileSuffix = file.name.substring(file.name.lastIndexOf(".") + 1);

      const whiteList = ["doc", "docx", "pdf", "txt"];

      if (whiteList.indexOf(fileSuffix) === -1) {
        this.$message({message:"上传文件只能是 docx/pdf/txt格式", type: 'warning'});
        return false;
      }

      this.loading = this.$loading({
        lock: true,
        spinner: 'el-icon-loading',
        background: 'rgba(0, 0, 0, 0.7)'
      })
    },
    uploadSuccess(res) {
      this.loading.close()
      if (res.code !== 0) {
        return this.$message.error(res.msg)
      } else {
        if (res.msg != '') {
          this.$message({
            message: res.msg,
            type: 'success',
            duration: 1500,
            onClose: () => {}
          })
        }
        //console.log(res.data)
        this.dataForm = {...res.data};
        this.dataForm.isTraining = 0; //新上传的文档设置为未训练
        this.dataForm.type = 4; //扩展用的字段,4表示文件
      }
    },
    uploadError(res) {
      this.loading.close()
      this.$message({
        message: this.$t(res.msg),
        type: 'warning',
        duration: 1500
      })
    },
    handleClose(done) {
      this.uploadMsgDialogVisible = false;
    },
    // 表单提交
    dataFormSubmitHandle: debounce(function () {
      this.$refs['dataForm'].validate((valid) => {
        if (!valid) {
          return false
        }
        this.$http[!this.dataForm.id ? 'post' : 'put']('/filemgt/filemgt/', this.dataForm).then(({ data: res }) => {
          if (res.code !== 0) {
            return this.$message.error(res.msg)
          }
          this.$message({
            message: this.$t('prompt.success'),
            type: 'success',
            duration: 500,
            onClose: () => {
              this.visible = false
              this.$emit('refreshDataList')
            }
          })
        }).catch(() => {})
      })
    }, 1000, { 'leading': true, 'trailing': false })
  }
}
</script>
页面效果如下:
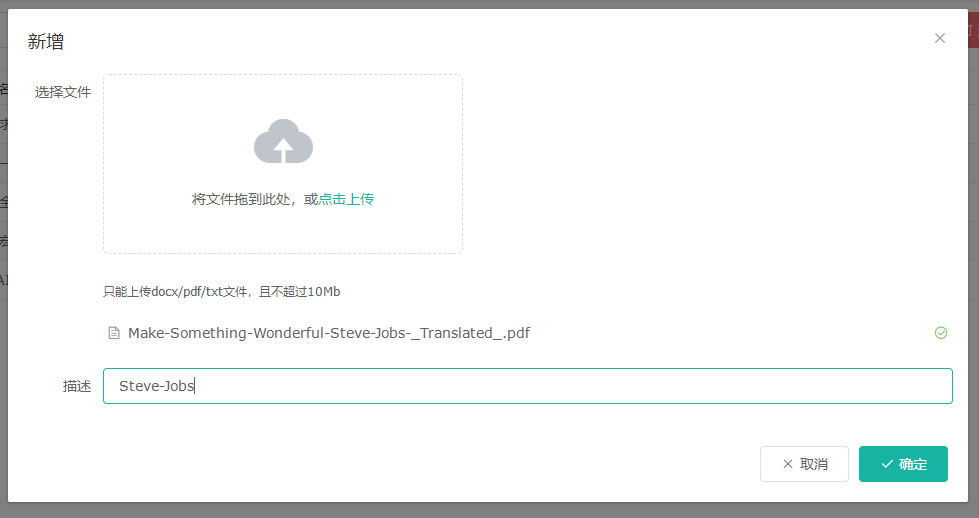
以上代码的主要逻辑是为了实现文档的上传功能,同时限制了文档个格式为doc,pdf,txt等。以下是部分代码解释:
<el-dialog>是一个对话框组件,用于展示文件上传的弹窗。:visible.sync="visible"表示通过visible属性控制对话框的显示和隐藏,:title属性根据dataForm.id的值来确定对话框的标题是"添加"还是"更新",:close-on-click-modal="false"和:close-on-press-escape="false"表示点击对话框外部和按下ESC键时不关闭对话框。
<el-upload>是一个文件上传组件,用于实现文件的拖拽上传和点击上传。:action属性指定了文件上传的URL,:show-file-list属性表示是否显示已上传的文件列表,:on-success和:on-error属性分别指定了上传成功和上传失败的回调方法,:before-upload属性指定了上传文件之前的回调方法。
methods中的方法解释:
init方法用于初始化对话框,设置对话框的显示状态,并重置表单的字段。
getInfo方法用于获取文件的相关信息(在修改时),发送HTTP请求并根据返回结果进行相应的操作。
onBeforeUpload方法在上传文件之前进行校验,判断文件的后缀名是否符合要求。
uploadSuccess方法在文件上传成功后的回调,根据返回结果进行相应的操作。
uploadError方法在文件上传失败后的回调,显示错误提示信息。
handleClose方法用于关闭对话框。
dataFormSubmitHandle方法用于表单的提交,先进行表单的校验,然后发送HTTP请求进行数据的添加或更新。
在文档管理页面,点击列表中的对话,将弹出与该文档对话的dialog页面,代码如下:
<template>
  <div>
    <el-dialog
      :title="dialogTitle"
      :visible.sync="visible"
      width="70%"
      :close-on-click-modal="false"
      :close-on-press-escape="false"
    >
      <div>
        <div>
          <div>
            <div>
              <div
                v-for="message in messages"
                :key="message.id"

              >
                <div v-if="message.type === 'user'">
                  <img
                    src="../../../assets/img/avatar.png"
                    alt=""

                  />
                  <span>
                    {{ message.text }}
                  </span>
                </div>
                <div style="clear: both"></div>
                <div v-if="message.type === 'ai'">
                  <img
                    src="../../../assets/img/ai.png"
                    alt=""

                  />
                  <span>{{ message.text }}</span>
                </div>
                <div style="clear: both"></div>
              </div>
              <div v-if="loadingshow">
                <img
                  src="../../../assets/img/ai.png"
                  alt=""

                />
                <div v-loading="loading"></div>
              </div>
            </div>
          </div>
        </div>
        <div>
          <form @submit.prevent="sendMessage">
            <input
              type="text"
              v-model="userInput"
              placeholder="请输入你的问题..."
              :disabled="inputdisabled"
            />
            <button type="submit">发送</button>
          </form>
        </div>
      </div>
    </el-dialog>
  </div>
</template>

<script>
export default {
  name: "ChatDialog",
  data() {
    return {
      inputdisabled: false,
      loadingshow: false,
      loading: true,
      visible: false,
      finalDataList: [],
      multiple: true,
      dialogTitle: "智能AI.文档检索",
      messages: [
        {
          id: Date.now(),
          type: "ai",
          text: "你好,我是AI模型",
        },
      ],
      userInput: "",
      dataForm: {
        name: "",
        isTraining: "",
        suffix: "",
        remarks: "",
      },
    };
  },
  methods: {
    init(id) {
      this.visible = true;
      this.$nextTick(() => {
        if (this.dataForm.id) {
          this.getInfo();
        }
      });
    },
    // 获取信息
    getInfo() {
      this.$http
        .get(`/filemgt/filemgt/${this.dataForm.id}`)
        .then(({ data: res }) => {
          if (res.code !== 0) {
            return this.$message.error(res.msg);
          }
          this.dataForm = {
            ...this.dataForm,
            ...res.data,
          };
          this.dialogTitle =
            "智能AI.文档检索 与《" + this.dataForm.name + "》 对话";
        })
        .catch(() => {});
    },
    // chaat交互
    sendMessage() {
      let sendMsg = {};
      if (this.userInput !== "") {
        sendMsg = {
          username: "user", //对话的问
          msg: this.userInput,
          type: 1,
          fileId: this.dataForm.id,
        };

        // 将用户的消息添加到消息列表中
        this.messages.push({
          id: Date.now(),
          type: "user",
          text: this.userInput,
        });
      }

      // 可以在这里添加调用后端API的逻辑,获取AI模型的响应
      // 将AI模型的响应添加到消息列表中
      if (this.userInput !== "") {
        this.loadingshow = true;
        this.inputdisabled = true;
        // 清空用户输入框
        this.userInput = "";
        this.$http["post"]("/filemgt/filemgt/chatWithDoc", sendMsg)
          .then(({ data: res }) => {
            if (res.code !== 0) {
              return this.$message.error(res.msg);
            }
            let len = this.messages.length;
            this.messages.push({
              id: Date.now() + 1,
              type: "ai",
              text: res.data.message,
            });
            let lens = this.messages.length;
            if (lens > len) {
              // 在DOM更新完成后执行回调函数
              this.$nextTick(() => {
                this.chatroll();
              });
            }
            this.loadingshow = false;
            this.inputdisabled = false;
          })
          .catch(() => {});
      }
    },
    chatroll() {
      // 获取需要操作的元素
      const chatbox = document.querySelector(".chatbox");
      // 获取元素的高度
      let chatboxHeight = chatbox.scrollHeight;
      const chatrollHeight = chatbox.clientHeight;
      //console.log(chatboxHeight,chatrollHeight);

      // 判断是否需要滚动
      if (chatboxHeight > chatrollHeight) {
        // 滚动到底部
        chatbox.scrollTop = chatboxHeight - chatrollHeight;
        //console.log(chatbox.scrollTop);
      }
    },
  },
};
</script>

<style scoped>
.chatting {
  box-sizing: border-box;
  font-family: "楷体";

  .content {
    background: #fefefe;
    box-shadow: 0 0 10px rgba(0, 0, 0, 0.1);
    border-radius: 0.4rem;
    overflow: hidden;
    height: 40rem;

    .chatpadding {
      height: 35rem;
      padding: 1rem 0.8rem;

      .chatbox {
        height: 35rem;
        overflow-y: auto;
        scroll-behavior: smooth;

        .chatflex {
          .ai {
            width: 60%;
            float: left;
            font-size: 1.1rem;
            display: flex;
            align-items: flex-start;

            .photograph {
              width: 2.5rem;
              border-radius: 50%;
            }

            span {
              background-color: #fff;
              box-shadow: 0 0 10px rgba(0, 0, 0, 0.1);
              color: #333;
              line-height: 2.2rem;
              border-radius: 10px;
              margin-bottom: 10px;
              display: inline-block;
              margin-left: 0.6rem;
              max-width: 90%;
              padding: 0 0.5rem;
            }
          }

          .user {
            width: 60%;
            float: right;
            font-size: 1.1rem;

            .photograph {
              width: 2.5rem;
              border-radius: 50%;
              float: right;
            }

            .user_txt {
              background-color: #fff;
              color: #333;
              box-shadow: 0 0 10px rgba(0, 0, 0, 0.1);
              line-height: 2rem;
              border-radius: 10px;
              margin-bottom: 10px;
              max-width: 90%;
              padding: 0 0.5rem;
              float: right;
              margin-right: 0.6rem;
            }
          }
        }
        .loading_chat {
          margin-top: 1rem;
          display: flex;
          align-items: flex-start;
          img {
            width: 2.5rem;
            border-radius: 50%;
          }
          .loading_img {
            margin-top: 1rem;
            margin-left: 1rem;
          }
        }
      }
    }

    .issue {
      margin-top: 2rem;

      input {
        width: 90%;
        height: 2rem;
        border: 1px solid #ccc;
        border-radius: 0.2rem;
        padding: 0.2rem;
        box-sizing: border-box;
        margin-left: 1%;

        &[type="text"]:focus {
          border-color: #00aadd;
        }
      }

      button {
        width: 8%;
        height: 2rem;
        border: 1px solid #ccc;
        border-radius: 0.2rem;
        padding: 0.2rem;
        box-sizing: border-box;

        &:active {
          background-color: #00aadd;
          color: #fff;
        }
      }
    }
  }
}
</style>
页面效果图如下:

以上代码是与文档对话的页面,类似于一个聊天窗口,主要功能就是把问题发送到后端,后端解答完毕后展现到前端页面上。
<el-dialog>是一个对话框组件,用于展示聊天对话框。:visible.sync="visible"表示通过visible属性控制对话框的显示和隐藏,:title属性设置对话框的标题,width属性设置对话框的宽度。
在对话框中,使用了一些<div>元素来布局聊天内容和用户输入框。v-for指令用于循环渲染messages数组中的每个消息,:key属性指定了每个消息的唯一标识,:class属性根据消息的类型设置不同的样式。
用户输入框和发送按钮位于<form>元素中,@submit.prevent指令用于阻止表单的默认提交行为,v-model指令用于双向绑定用户输入的内容。
methods定义了一些方法:
init方法用于初始化对话框,设置对话框的显示状态。
getInfo方法用于获取文件的信息,发送HTTP请求并根据返回结果进行相应的操作。
sendMessage方法用于发送用户输入的消息,将消息添加到消息列表中,并调用后端API获取AI模型的响应,将响应添加到消息列表中。
chatroll方法用于滚动聊天内容到底部。
使用了SCSS语法,设置了一些样式规则,包括对话框的样式、聊天内容的样式、用户输入框和发送按钮的样式等。
扫码关注不迷路!!!
郑州升龙商业广场B座25层
service@iqiqiqi.cn

联系电话:187-0363-0315
联系电话:199-3777-5101